매일 사용하는 놀라운 파이썬 자동화 스크립트 17가지
17 Mindblowing Python Automation Scripts I Use Everyday
" 생산성과 성능을 향상시킨 스크립트 "

거의 10년 동안 파이썬을 사용해 왔으며, 여전히 저를 매료시키고 더 많은 연구에 대한 동기를 부여하는 한 가지는 바로 자동화 기능입니다. 지난 1년 동안 저는 파이썬의 자동화 측면을 탐구하면서 놀라운 파이썬 패키지, 사실, 흥미로운 스크립트를 발견했습니다. 이 블로그에서는 매일 사용하며 생산성과 성능을 향상시킨 자동화 스크립트 몇 가지를 공유하고자 합니다.

1. Speakify
저는 책을 좋아하지만 혼자서 읽는 것을 싫어하고 오히려 듣는 것을 좋아합니다. 이 자동화 스크립트는 저에게 생명의 은인입니다. PDF를 나중에 듣기 위해 오디오북으로 변환하는 데 많이 사용합니다.
import PyPDF2      # pip install pypdf2
import pyttsx3     # pip install pyttsx3

# Open the PDF file (Enter Path To Your PDF)
file = open('story.pdf', 'rb')
readpdf = PyPDF2.PdfReader(file)

# Initialize text-to-speech engine
speaker = pyttsx3.init()
rate = speaker.getProperty('rate')   # Get current speaking rate
speaker.setProperty('rate', 200)

volume = speaker.getProperty('volume')
speaker.setProperty('volume', 1)  # Set volume level (0.0 to 1.0)

# Get and set a different voice
voices = speaker.getProperty('voices')
for voice in voices:
    if "english" in voice.name.lower() and "us" in voice.name.lower():
        speaker.setProperty('voice', voice.id)
        break
# Iterate over each page in the PDF
for pagenumber in range(len(readpdf.pages)):
    # Extract text from the page
    page = readpdf.pages[pagenumber]
    text = page.extract_text()

    # Use the speaker to read the text
    # speaker.say(text)
    # speaker.runAndWait()

# Save the last extracted text to an audio file (if needed)
speaker.save_to_file(text, 'story.mp3')
speaker.runAndWait()

# Stop the speaker
speaker.stop()

# Close the PDF file
file.close()
애플리케이션
- 시각 장애인을 위한 접근성: 시각 장애인이 정보에 쉽게 액세스할 수 있도록 서면 콘텐츠의 오디오 버전을 제공합니다.
- 이동 중 학습: 사용자가 출퇴근이나 운동 중에 기사나 교과서를 들을 수 있도록 합니다.
- 언어 학습: 언어 학습자가 텍스트의 오디오 버전을 제공하여 듣기 능력을 향상시킬 수 있도록 지원합니다.
- 교육: 학생들에게 보다 유연한 학습 옵션을 위해 읽기 자료의 오디오 버전을 제공합니다.
2. TabTornado
이 스크립트를 작성하기 전에는 다음날 읽을 만한 흥미로운 내용을 북마크에 추가하곤 했는데, 몇 주가 지나면서 북마크 리스트의 길이가 나날이 커지고 매일 새로운 북마크를 찾는 데 어려움을 겪고 있다는 사실을 깨달았습니다. 그래서 저는 이 문제를 해결할 수 있는 피타고라스적인 방법을 생각해냈습니다. 이 자동화 스크립트를 사용하면 모든 링크를 복사하여 붙여넣은 다음 클릭 한 번으로 열 수 있습니다.
import webbrowser
with open('links.txt') as file:
    links = file.readlines()
    for link in links:
        webbrowser.open('link')
애플리케이션
- 업무 효율성 향상: 여러 업무 관련 사이트를 확인해야 하는 전문가는 링크를 여는 과정 대신 콘텐츠에 집중하여 업무를 간소화할 수 있습니다.
- 학습 및 개발: 온라인 학습자는 모든 강의 자료, 문서, 리소스를 한 번에 열 수 있어 학습 세션의 효율성이 높아집니다.
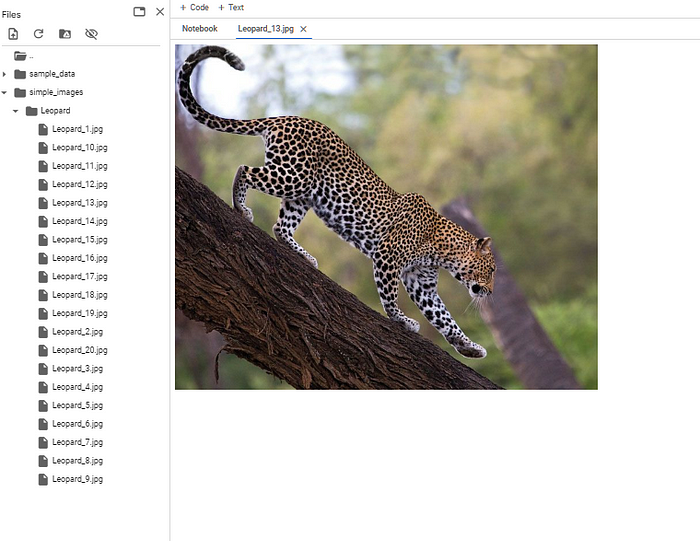
3. PicFetcher
대량의 이미지 데이터를 수집하는 것은 컴퓨터 비전 프로젝트의 핵심 과제입니다. 앤드류 응이 지적했듯이, 빅 데이터 세트는 사용되는 특정 알고리즘보다 더 중요할 수 있습니다. 고품질 데이터는 머신러닝 모델의 성능과 정확도를 향상시키는 데 필수적입니다. 이 자동화 스크립트를 사용하면 최소한의 코딩 작업으로 단 몇 분 만에 웹에서 정해진 수의 이미지를 다운로드할 수 있어 프로세스가 더 쉬워집니다.
# Importing the necessary module and function
from simple_image_download import simple_image_download as simp

# Creating a response object
response = simp.simple_image_download

## Keyword
keyword = "Dog"

# Downloading images
try:
    response().download(keyword, 20)
    print("Images downloaded successfully.")
except Exception as e:
    print("An error occurred:", e)
애플리케이션
- 컴퓨터 비전 데이터 세트 구축, 배너 이미지 콘텐츠 제작, 마케팅 캠페인, 학술 연구 등 다양한 분야에서 활용되고 있습니다.
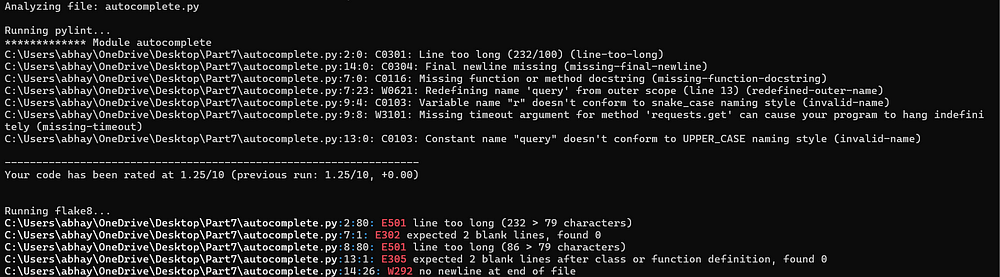
4. PyInspector
모든 개발자는 파이썬 코드의 버그를 추적하다 보면 종종 오류의 그물망에 걸려 좌절감을 느낀다는 것을 알고 있습니다. 깔끔하고 효율적인 코드를 작성하는 것은 매우 중요하지만, 수동으로 코드 품질을 분석하는 것은 어려울 수 있습니다. 이 자동화 스크립트는 Pylint 및 Flake8 패키지를 사용하여 코드를 철저히 검토하고, 코딩 표준과 비교하고, 논리적 오류를 찾아냅니다. 이를 통해 코드가 업계 모범 사례를 따르고 오류가 없는 상태를 유지할 수 있습니다.
import os
import subprocess

def analyze_code(directory):
    # List Python files in the directory
    python_files = [file for file in os.listdir(directory) if file.endswith('.py')]

    if not python_files:
        print("No Python files found in the specified directory.")
        return

    # Analyze each Python file using pylint and flake8
    for file in python_files:
        print(f"Analyzing file: {file}")
        file_path = os.path.join(directory, file)

        # Run pylint
        print("\nRunning pylint...")
        pylint_command = f"pylint {file_path}"
        subprocess.run(pylint_command, shell=True)

        # Run flake8
        print("\nRunning flake8...")
        flake8_command = f"flake8 {file_path}"
        subprocess.run(flake8_command, shell=True)

if __name__ == "__main__":
    directory = r"C:\Users\abhay\OneDrive\Desktop\Part7"
    analyze_code(directory)
5. DataDummy
모델을 테스트하기 위해 샘플 데이터가 필요한 데이터 과학자든, 무작위 정보로 불필요한 양식을 채우려는 데이터 과학자든, 이 Python 자동화 스크립트는 매우 유용합니다. 사실적으로 보이지만 완전히 인공적인 데이터 세트를 생성하여 테스트, 개발 및 시뮬레이션 목적에 적합합니다. 이 도구는 이름, 이메일, 전화번호 등을 빠르게 생성할 수 있어 다양한 데이터 생성 요구에 맞는 다용도 솔루션을 제공합니다.
import pandas as pd
from faker import Faker
import random

fake = Faker()

def generate_fake_data(num_entries=10):
    data = []

    for _ in range(num_entries):
        entry = {
            "Name": fake.name(),
            "Address": fake.address(),
            "Email": fake.email(),
            "Phone Number": fake.phone_number(),
            "Date of Birth": fake.date_of_birth(minimum_age=18, maximum_age=65).strftime("%Y-%m-%d"),
            "Random Number": random.randint(1, 100),
            "Job Title": fake.job(),
            "Company": fake.company(),
            "Lorem Ipsum Text": fake.text(),
        }
        data.append(entry)

    return pd.DataFrame(data)

if __name__ == "__main__":
    num_entries = 10  # You can adjust the number of entries you want to generate
    fake_data_df = generate_fake_data(num_entries)


## Dataframe with Fake Data
fake_data_df

6. BgBuster
이 자동화 스크립트는 제 일상적인 툴킷의 필수 요소가 되었습니다. 개인적으로 이미지 작업을 자주 하기 때문에 배경 없이 이미지가 필요할 때가 많습니다. 이 작업에 사용할 수 있는 온라인 도구는 많지만, 인터넷에 있는 이미지의 개인정보와 보안에 대한 우려가 있습니다. 이 Python 스크립트는 rembg 패키지를 사용하여 이미지 배경을 로컬에서 제거함으로써 제 사진을 안전하게 비공개로 유지할 수 있게 해줍니다.
from rembg import remove
from PIL import Image

## Path for input and output image
input_img = 'monkey.jpg'
output_img = 'monkey_rmbg.png'

## loading and removing background
inp = Image.open(input_img)
output = remove(inp)

## Saving background removed image to same location as input image
output.save(output_img)


7. MemoryMate
보통 업무에 몰입하는 동안 중요한 작업을 기억해야 할 때가 많습니다. 이 문제를 해결하고 생산성을 높이기 위해 파이썬을 사용해 디지털 기억 보조 도구인 MemoryMate를 개발했습니다. 이 앱은 지정된 시간이 지나면 사용자 지정 메시지로 알림을 보내 제 시간에 작업을 완료할 수 있도록 도와줍니다. MemoryMate 덕분에 생산성이 크게 향상되었고 마감일을 꾸준히 지키는 데 도움이 되었습니다. 가장 좋은 점은 간단하고 복제하기 쉬우며 매우 유용하다는 점입니다.
from win10toast import ToastNotifier
import time

toaster = ToastNotifier()

def set_reminder():
    reminder_header = input("What would you like me to remember?\n")
    related_message = input("Related Message:\n")
    time_minutes = float(input("In how many minutes?\n"))

    time_seconds = time_minutes * 60

    print("Setting up reminder...")
    time.sleep(2)
    print("All set!")

    time.sleep(time_seconds)

    toaster.show_toast(
        title=f"{reminder_header}",
        msg=f"{related_message}",
        duration=10,
        threaded=True
    )

    while toaster.notification_active():
        time.sleep(0.005)

if __name__ == "__main__":
    set_reminder()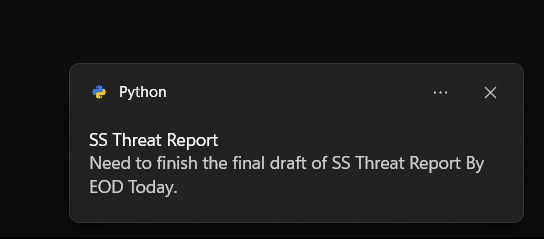
파이썬에서는 큰 숫자에 대해 자동으로 '큰 정수' 유형을 사용하기 때문에 `999**999`와 같은 매우 큰 정수로 오버플로 오류 없이 계산을 수행할 수 있다는 사실을 알고 계셨나요?
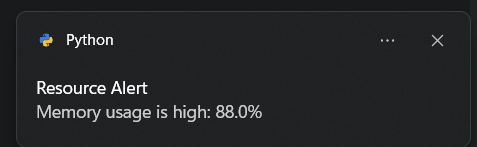
8. MonitorMax
시스템 리소스 모니터링은 다양한 시스템 리소스의 실시간 사용률을 표시하는 데 매우 중요합니다. 시스템 성능을 추적하고 병목 현상을 파악하며 효율적인 리소스 관리를 보장해야 하는 사용자, 시스템 관리자 및 개발자에게 매우 유용한 도구입니다. 이 Python 자동화 스크립트는 CPU, GPU, 배터리 및 메모리 사용량을 모니터링하여 리소스 사용량이 안전 임계값을 초과하는 경우 경고를 생성합니다.

import psutil
import time
from win10toast import ToastNotifier

# Initialize the ToastNotifier object
toaster = ToastNotifier()

# Set the threshold values for CPU usage, memory usage, GPU usage, and battery level
cpu_threshold = 40  # Percentage
memory_threshold = 40  # Percentage
gpu_threshold = 40  # Percentage
battery_threshold = 100  # Percentage

# Infinite loop to continuously monitor system resources
while True:
    try:
        # Get system resource information
        cpu_usage = psutil.cpu_percent(interval=1)
        memory_usage = psutil.virtual_memory().percent
        gpu_usage = psutil.virtual_memory().percent
        battery = psutil.sensors_battery()

        # Check CPU usage
        if cpu_usage >= cpu_threshold:
            message = f"CPU usage is high: {cpu_usage}%"
            toaster.show_toast("Resource Alert", message, duration=10)

        # Check memory usage
        if memory_usage >= memory_threshold:
            message = f"Memory usage is high: {memory_usage}%"
            toaster.show_toast("Resource Alert", message, duration=10)

        # Check GPU usage
        if gpu_usage >= gpu_threshold:
            message = f"GPU usage is high: {gpu_usage}%"
            toaster.show_toast("Resource Alert", message, duration=10)

        # Check battery level
        if battery is not None and battery.percent <= battery_threshold and not battery.power_plugged:
            message = f"Battery level is low: {battery.percent}%"
            toaster.show_toast("Battery Alert", message, duration=10)

        # Wait for 5 minutes before checking the resources again
        time.sleep(300)

    except Exception as e:
        print("An error occurred:", str(e))
        break
애플리케이션
이 스크립트는 게임 플레이, 로컬 서버 실행, 로컬에서 DL 모델 훈련 등과 같은 일상적인 시나리오에서 사용할 수 있습니다. 모든 리소스를 추적하여 스크립트나 작업이 최적의 메모리를 사용하는지 확인할 수 있으며, 그렇지 않은 경우 그에 따라 최적화할 수 있습니다. 리소스 모니터 대시보드(Tkinter를 사용하여 대시보드를 만들면 작업 표시줄과 유사한 실시간 리소스 그래프와 알림, 높은 메모리 사용량 소리 알림을 추가할 수 있습니다).
9. EmailBlitz
마케팅 캠페인, 뉴스레터, 조직 업데이트 등 대량의 이메일 커뮤니케이션을 처리하는 일은 쉽지 않을 수 있습니다. 이 Python 자동화 스크립트를 사용하면 이메일을 손쉽게 대량으로 보낼 수 있어 작업이 쉬워집니다. 커뮤니케이션 프로세스를 간소화하여 많은 수신자 그룹에 동시에 도달할 수 있고 적시에 효율적인 메시지 전달을 보장합니다. 마케터, 관리자 또는 수많은 이메일을 보내야 하는 모든 사람에게 이상적인 이 스크립트는 생산성을 향상하고 시간을 절약하며 커뮤니케이션에서 개인적인 느낌을 유지하는 데 도움이 됩니다.
import smtplib
from email.message import EmailMessage
import pandas as pd

def send_email(remail, rsubject, rcontent):
    email = EmailMessage()                          ## Creating a object for EmailMessage
    email['from'] = 'The Pythoneer Here'            ## Person who is sending
    email['to'] = remail                            ## Whom we are sending
    email['subject'] = rsubject                     ## Subject of email
    email.set_content(rcontent)                     ## content of email
    with smtplib.SMTP(host='smtp.gmail.com',port=587)as smtp:
        smtp.ehlo()                                 ## server object
        smtp.starttls()                             ## used to send data between server and client
        smtp.login(SENDER_EMAIL,SENDER_PSWRD)       ## login id and password of gmail
        smtp.send_message(email)                    ## Sending email
        print("email send to ",remail)              ## Printing success message


if __name__ == '__main__':
    df = pd.read_excel('list.xlsx')
    length = len(df)+1

    for index, item in df.iterrows():
        email = item[0]
        subject = item[1]
        content = item[2]

        send_email(email,subject,content)
10. ClipSaver
여러 개의 텍스트 스니펫을 저글링하다가 복사한 내용을 잃어버린 적이 있으신가요? 하루 종일 복사한 모든 내용을 추적할 수 있는 도구가 있다고 상상해 보세요. 이 Python 자동화 스크립트가 바로 그 역할을 해줍니다. 복사한 모든 내용을 모니터링하고 각 텍스트 스니펫을 매끄러운 그래픽 인터페이스에 완벽하게 저장합니다. 이 스크립트를 사용하면 더 이상 끝없는 탭을 검색하거나 중요한 정보를 잃어버릴 위험 없이 모든 것을 체계적으로 정리하고 쉽게 액세스할 수 있습니다.
import tkinter as tk
from tkinter import ttk
import pyperclip

def update_listbox():
    new_item = pyperclip.paste()
    if new_item not in X:
        X.append(new_item)
        listbox.insert(tk.END, new_item)
        listbox.insert(tk.END, "----------------------")
    listbox.yview(tk.END)
    root.after(1000, update_listbox)

def copy_to_clipboard(event):
    selected_item = listbox.get(listbox.curselection())
    if selected_item:
        pyperclip.copy(selected_item)

X = []

root = tk.Tk()
root.title("Clipboard Manager")
root.geometry("500x500")
root.configure(bg="#f0f0f0")

frame = tk.Frame(root, bg="#f0f0f0")
frame.pack(padx=10, pady=10)

label = tk.Label(frame, text="Clipboard Contents:", bg="#f0f0f0")
label.grid(row=0, column=0)

scrollbar = tk.Scrollbar(root)
scrollbar.pack(side=tk.RIGHT, fill=tk.Y)

listbox = tk.Listbox(root, width=150, height=150, yscrollcommand=scrollbar.set)
listbox.pack(pady=10)
scrollbar.config(command=listbox.yview)

update_listbox()

listbox.bind("<Double-Button-1>", copy_to_clipboard)

root.mainloop()
코드 파일을 저장할 때 .py 확장자가 크게 중요하지 않다는 사실을 알고 계셨나요?
..............
스크립트가 유효하다면 .cow, .cat, .mango 등 모든 유형의 확장자를 사용하여 Python 파일을 저장할 수 있으며, 스크립트가 실행되고 원하는 출력을 제공할 수 있습니다.
11. BriefBot
저는 매일 기사, 연구 논문, 뉴스 간행물을 읽는 것을 좋아하고, 많은 사람들이 이런 습관을 가지고 있다는 것을 알고 있습니다. 하지만 기사 전체를 읽을 시간을 내기가 쉽지 않습니다. 이 Python 자동화 스크립트는 신경망을 사용해 빠른 요약을 생성함으로써 이 문제를 해결합니다. 이 스크립트는 웹 스크래핑을 활용하여 기사의 콘텐츠를 추출한 후 사전 학습된 모델에 공급하여 요약본을 생성하므로 시간을 절약하고 정보를 쉽게 파악할 수 있습니다.
from transformers import BartForConditionalGeneration, BartTokenizer
import requests
from bs4 import BeautifulSoup

## Function to summarize article
def summarize_article(article_text, max_length=150):
    model_name = "facebook/bart-large-cnn"
    tokenizer = BartTokenizer.from_pretrained(model_name)
    model = BartForConditionalGeneration.from_pretrained(model_name)

    inputs = tokenizer.encode("summarize: " + article_text, return_tensors="pt", max_length=1024, truncation=True)
    summary_ids = model.generate(inputs, max_length=max_length, min_length=50, length_penalty=2.0, num_beams=4, early_stopping=True)

    summary = tokenizer.decode(summary_ids[0], skip_special_tokens=True)
    return summary

## Function to scrape content of the aricle
def scrape_webpage(url):
    try:
        headers = { "User-Agent": "Mozilla/5.0 (Windows NT 10.0; Win64; x64) AppleWebKit/537.36 (KHTML, like Gecko) Chrome/58.0.3029.110 Safari/537.3"} ##
        response = requests.get(url, headers=headers)
        response.raise_for_status()
        soup = BeautifulSoup(response.text, 'html.parser')
        all_text = soup.get_text(separator='\n', strip=True)
        return all_text
    except requests.exceptions.RequestException as e:
        print(f"Error: {e}")
        return None

if __name__ == "__main__":
    webpage_url = "https://thehackernews.com/2024/07/new-ransomware-group-exploiting-veeam.html" ## Sample URL for Testing The Script
    webpage_text = scrape_webpage(webpage_url)

    if webpage_text:
        summary = summarize_article(webpage_text)
        print("\nSummarized Article:")
        print(summary)
    else:
        print("Webpage scraping failed.")
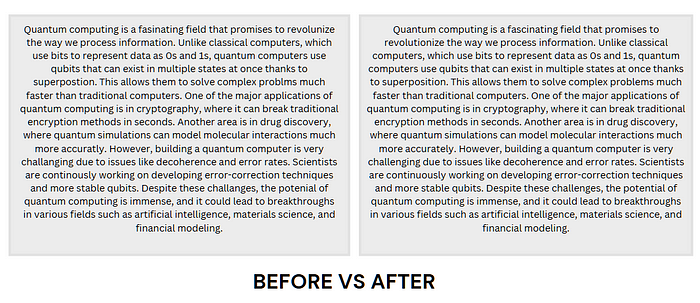
12. SpellGuard
아무리 영어를 잘해도 긴 보고서, 기사 또는 연구 논문을 작성할 때 철자와 문법 실수를 범하기 마련입니다. AI 시대에는 이러한 오류를 바로잡고 세련된 교정을 제공하는 수많은 강력한 Python 패키지가 있습니다. 이 Python 스크립트는 AI를 활용하여 맞춤법 및 문법 오류를 감지하고 수정함으로써 명확하고 정확하며 전문적인 글을 작성할 수 있도록 도와줍니다.
## Installing Library
!pip install lmproof

## Importing Library
import lmproof as lm

## Function for proofreading
def Proofread(text):
    proof = lm.load("en")
    error_free_text = proof.proofread(text)
    return error_free_text

## Sample Text
TEXT = '' ## Place sample Text here

## Function Call
Print(Proofread(TEXT))
13. LinkStatus
블로그 사이트를 소유하는 것은 여전히 많은 작가들에게 꿈입니다. 전문적이고 사용자 친화적인 블로그를 유지하려면 모든 링크가 제대로 작동하는지 확인하는 것이 중요합니다. 끊어진 링크는 독자를 실망시키고 사이트의 신뢰도를 떨어뜨릴 수 있습니다. 이 Python 자동화 스크립트를 사용하면 여러 URL의 웹 연결 상태를 손쉽게 확인할 수 있습니다. 이 스크립트는 URL을 정기적으로 모니터링하여 링크가 항상 정상적으로 작동하는지 확인함으로써 사이트의 안정성과 사용자 경험을 향상시킵니다.
import csv
import requests
import pprint

def get_status(website):
    try:
        status = requests.get(website).status_code
        return "Working" if status == 200 else "Error 404"
    except:
        return "Connection Failed!!"

def main():
    with open("sites.txt", "r") as fr:
        websites = [line.strip() for line in fr]

    web_status_dict = {website: get_status(website) for website in websites}

    pprint.pprint(web_status_dict)

    # Write results to CSV file
    with open("web_status.csv", "w", newline='') as csvfile:
        fieldnames = ["Website", "Status"]
        writer = csv.DictWriter(csvfile, fieldnames=fieldnames)

        writer.writeheader()
        for website, status in web_status_dict.items():
            writer.writerow({"Website": website, "Status": status})

        print("Data Uploaded to CSV File!!")

if __name__ == "__main__":
    main()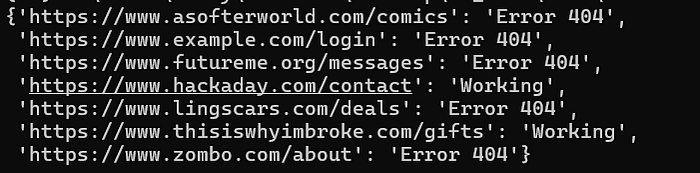
파이썬에서 중국어 문자열을 변수명으로 유지할 수 있습니다.
예: 金竹戈女日 = "Hello World"
14. DailyDigest
도시, 주, 국가 또는 전 세계에서 일어나는 최신 사건에 대한 정보를 얻는 것은 중요하지만 바쁜 일정으로 인해 뉴스를 읽는 데 시간을 할애할 수 없는 경우가 많습니다. 이 자동화 스크립트는 Google 뉴스에서 인기 있는 뉴스를 스크랩하여 소리 내어 읽어줌으로써 이러한 문제를 해결해 줍니다. 하루를 시작할 때나 이동 중에도 이 스크립트를 사용하면 손쉽게 최신 뉴스를 확인할 수 있습니다.
import pyttsx3
import requests

engine = pyttsx3.init('sapi5')
voices = engine.getProperty('voices')
engine.setProperty('voice', voices[0].id)

def speak(audio):
    engine.say(audio)
    engine.runAndWait()

def trndnews():
    url = " http://newsapi.org/v2/top-headlines?country=us&apiKey=GET_YOUR_OWN"
    page = requests.get(url).json()
    article = page["articles"]
    results = []
    for ar in article:
        results.append(ar["title"])
    for i in range(len(results)):
        print(i + 1, results[i])
    speak(results)

trndnews()

''' Run The Script To Get The Top Headlines From USA'''
15. QRGenie
사람들이 QR 코드를 결제 송수신에 사용하기 시작하면서 QR 코드의 인기는 급상승했습니다. 요즘에는 소셜 링크, 비밀 메시지, 쿠폰 코드 등을 공유하는 데 사용됩니다. 이 Python 자동화 스크립트를 사용하면 선택한 데이터로 맞춤형 QR 코드를 생성하여 손쉽게 정보를 공유하고 청중에게 깊은 인상을 남길 수 있습니다.
import qrcode

def generate_qr_code(link, filename):
    """Generates a QR code for the given link and saves it as filename."""

    qr = qrcode.QRCode(
        version=1,
        error_correction=qrcode.constants.ERROR_CORRECT_L,
        box_size=10,
        border=4,
    )
    qr.add_data(link)
    qr.make(fit=True)

    img = qr.make_image(fill_color="black", back_color="white")
    img.save("profile.png")

if __name__ == "__main__":
    generate_qr_code("https://abhayparashar31.medium.com/", "Profile.png")
    print(f"QR code saved successfully!!")
16. ShrinkLink
매일 수많은 링크를 처리하는데, 일부는 저장하고 일부는 독자들과 공유합니다. 제가 URL에서 가장 싫어하는 부분은 길이가 길어 짜증스럽고 읽기어렵다는 점입니다. 이 자동화 스크립트는 외부 API를 사용하여 긴 URL을 짧고 관리하기 쉬운 링크로 변환함으로써 이 문제를 효율적으로 해결합니다.
import pyshorteners
def generate_short_url(long_url):
  s = pyshorteners.Shortener()
  return s.tinyurl.short(long_url)

long_url = input('Paste Long URl \n')
short_url = generate_short_url(long_url)
print(short_url)
17. CaptureIt
게이머, 인플루언서, 아티스트, 개발자에게 화면 녹화 소프트웨어는 자신의 활동을 캡처하는 데 필수적입니다. 하지만 기존의 많은 솔루션은 비용이 많이 들거나 워터마크, 시간 제약 등의 제약이 있습니다. 이 Python 자동화 스크립트는 워터마크와 시간 제한이 없고 사용자 지정 가능한 화면 창 옵션을 통해 간편하게 화면을 녹화할 수 있는 솔루션을 제공합니다.
import cv2
import numpy as np
import pyautogui

SCREEN_SIZE = tuple(pyautogui.size())
fourcc = cv2.VideoWriter_fourcc('M','J','P','G')
fps = 12.0
record_seconds = 20
out = cv2.VideoWriter("video.mp4", fourcc, fps, SCREEN_SIZE)

for _ in range(int(record_seconds * fps)):
    img = pyautogui.screenshot(region=(0, 0, 500, 900))
    frame = np.array(img)
    frame = cv2.cvtColor(frame, cv2.COLOR_BGR2RGB)
    out.write(frame)
    cv2.imshow("video frame", frame)
    if cv2.waitKey(1) == ord("q"):
        break

cv2.destroyAllWindows()
out.release()
extra. H2OReminder
이 자동화 스크립트는 사용자에게 일정한 간격으로 물을 마셔 수분을 보충하도록 상기시켜주는 간단하면서도 강력한 프로그램입니다. 컴퓨터 앞에서 오랜 시간을 보내거나 바쁜 일정으로 인해 물을 충분히 마시는 것을 잊어버릴 수 있는 사람들에게 매우 유용한 도구입니다. 이 스크립트는 전반적인 건강과 웰빙을 유지하는 데 필수적인 규칙적인 물 섭취를 장려하여 건강한 습관을 장려합니다.
import time
from plyer import notification

if __name__ == "__main__":
    while True:
        notification.notify(
            title="Please Drink Water",
            message="The U.S. National Academies of Sciences, Engineering, and Medicine determined that an adequate daily fluid intake is: About 15.5 cups (3.7 liters) of fluids a day for men. About 11.5 cups (2.7 liters) of fluids a day for women. Keep Drinking Water !!!",
            app_icon="./Desktop-drinkWater-Notification/icon.ico",
            timeout=12
        )
        time.sleep(1800)  ## Change it according to your water breaks!!!
[출처] 매일 사용하는 놀라운 파이썬 자동화 스크립트 17가지|작성자 몬스터싸부